This is going to be a strange Easter for all of us. It is usually a very busy day in the restaurant, with lots of spring lamb being ordered for lunch. On a positive note, I have enjoyed the time at home with the family over the past two weeks. The twins are both “helping” with the cooking and this cake is right up their street. This is a recipe for all ages so if you are keen to begin baking again give this a try.
Use good Irish butter and free-range eggs. I always keep vanilla extract in the kitchen so you might pick some up on one of the rare shopping expeditions these days. The crème fraîche keeps it nice and moist. Green & Black do a good cocoa powder that has no sugar.
You could also make cup cakes with this recipe for an Easter hunt, though it might have to be indoors this year. The cooking time will be shorter.
Wishing you a safe and peaceful Easter and let’s all look out for each other.
Happy cooking,
Neven
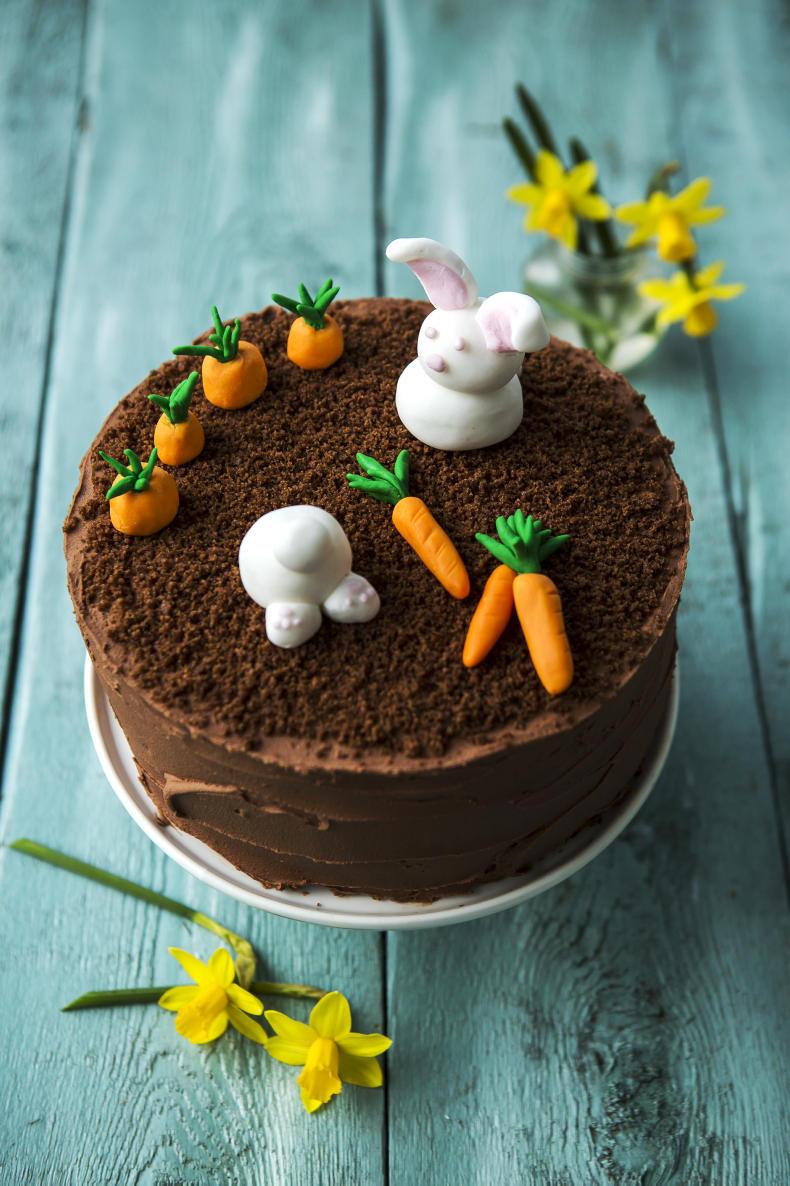
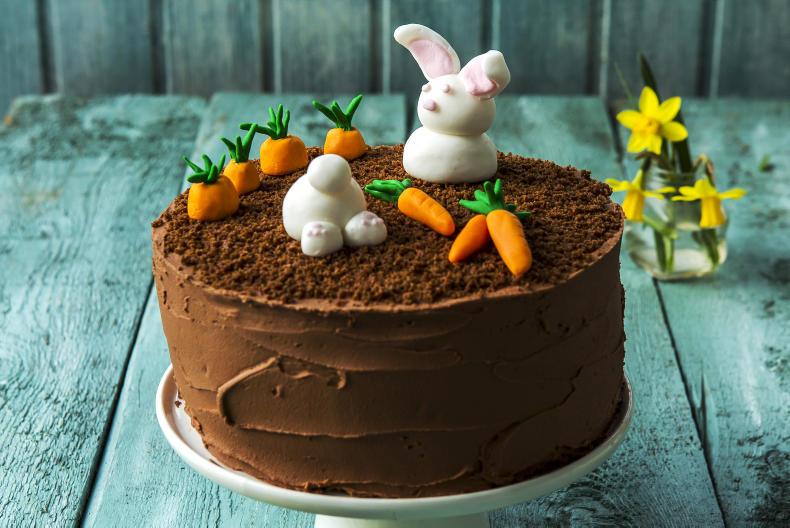
Easter Bunny chocolate cake. \ Photography: Philip Doyle. Food styling: Sharon Hearne-Smith
Easter Bunny chocolate cake
Serves eight plus
For the sponge:
200g butter, softened
350g light muscovado sugar
Seeds of ½ a vanilla pod or ½ tsp vanilla extract
Six eggs (at room temperature)
300g self-raising flour
1/2 tsp baking powder
50g cocoa powder
200g crème fraîche (at room temperature)
For the chocolate frosting:
100g plain chocolate, broken into squares
175g butter, softened
350g icing sugar, sifted
2 tbsp cream
To decorate:
150g orange fondant
100g green fondant
200g white fondant
100g pink fondant
1 Preheat the oven to 180°C. Line three 20cm non-stick cake tins with parchment paper. Cream the butter and sugar together in a large bowl with a wooden spoon (or using a freestanding electric mixer) until light and fluffy. Add the vanilla seeds or extract and two of the eggs, then beat like mad again. Add another two eggs and continue to beat. The mixture may look less than perfect at this stage, but keep going and it will come good. Add the last two eggs and beat well again. Sieve together the flour, baking powder and cocoa powder. Using a large metal spoon, fold the dry ingredients into the creamed mixture in alternate batches with the crème fraîche. Mix well between each addition, scraping down the bowl with a rubber spatula.2 Using the rubber spatula, separate the mixture among the prepared tins, smoothing down the tops. Bake for 25-30 minutes, until the cakes are springy to the touch and a skewer inserted into the middle of each one of them comes out clean. Cool for five minutes in the tins, then turn out on to a wire rack and leave to cool completely.3 When the cakes have cooled down completely, make the chocolate frosting. Melt the chocolate in a heatproof bowl set over a pan of simmering water. Leave to cool a little and then mix with the rest of the chocolate frosting ingredients. I put them all in my freestanding electric mixer with a paddle attachment and beat it for a good five minutes, until it is light and spreadable but it can also be done by hand. 4 Place one of the cakes on a plate or cake stand with a blob of frosting underneath so that the cake does not move and spread the top with a little more frosting. Cover with another cake and more frosting. Top with the remaining cake, flipping it over so that the flat side of the cake is now at the top giving a good flat base for the frosting. Lightly press all the cake layers together, then use a palette knife to spread the remaining frosting evenly over the top and sides of the cake so that the sides are nice and straight and the top is flat. I like to do a thin layer first which I call the crumb layer. Then place the cake in to the freezer for 10 minutes for the layer to firm up.5 Then take the cake from the freezer and add another thicker layer of frosting and have a good play around with the knife so that it is really smooth. Sometimes it helps to run the palette knife under the warm tap and then carry on smoothing the frosting. Leave to set a little whilst you prepare the decorations.6 Shape the orange and green fondant into carrots and make the white and pink fondant into bunnies. Once the cake is set arrange the carrots and bunnies on top and serve with a flourish! 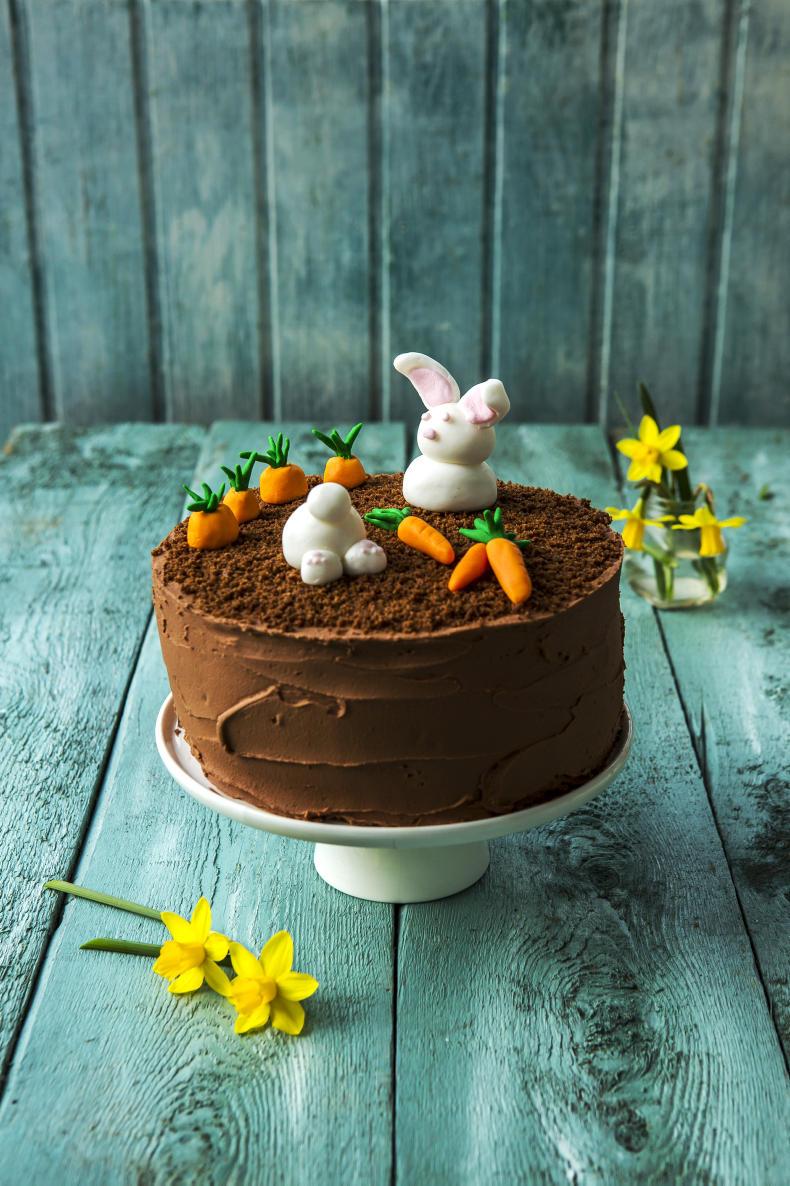
Easter Bunny chocolate cake. \ Photography: Philip Doyle. Food styling: Sharon Hearne-Smith
Red velvet cream cheese brownies
Makes nine
For the brownies:
100g white chocolate, broken into squares
100g butter
175g light brown sugar
1 tsp vanilla extract
2 tbsp cocoa powder
Two medium eggs
½ tsp red food colouring
125g plain flour
For the red velvet swirl:
200g cream cheese
2 tbsp plain flour
2 tbsp caster sugar
1 tsp vanilla extract
One medium egg yolk
To serve:
Vanilla ice cream, to serve
1 Preheat the oven to 180°C and line an 18cm square cake tin with baking parchment. Melt the white chocolate in a heatproof bowl set over a pan of simmering water (or use a microwave). Leave to cool a little.2 Melt the butter and put into a large bowl. Leave to cool and then add the light brown sugar, vanilla and cocoa powder and beat with a hand-held electric mixer. Add the eggs and food colouring and beat until well combined. 3 Fold in the melted white chocolate and then add the flour and using a large metal spoon, gently fold it all together with as few stirs as possible so you do not knock the air out of it. Gently spread into the prepared baking tin, leaving about two tablespoons behind in the bowl – you will use this later for the swirl pattern. Set aside.4 Beat all of the ingredients for the red velvet swirl in a bowl until the caster sugar is evenly combined. Dollop spoonfuls of it on top of the brownie mixture that is already in the tin. Then add the remaining two tablespoons of the brownie mixture. 5 Take a knife and swirl the brownie mixture around in the tin. Be sure not to over-swirl it otherwise the mixture will just look like a pink cake batter! But swirl deep into the tin so that the marble effect goes right through out the brownie and is not just at the top. 6 Place the tin into the oven and bake for 25-30 minutes or until the centre of the brownie springs back slightly when touched but it is still nice and gooey in the middle. Leave to cool a little in the tin, then cut into nine even-sized squares and serve warm or cold with ice cream, if you like.
This is going to be a strange Easter for all of us. It is usually a very busy day in the restaurant, with lots of spring lamb being ordered for lunch. On a positive note, I have enjoyed the time at home with the family over the past two weeks. The twins are both “helping” with the cooking and this cake is right up their street. This is a recipe for all ages so if you are keen to begin baking again give this a try.
Use good Irish butter and free-range eggs. I always keep vanilla extract in the kitchen so you might pick some up on one of the rare shopping expeditions these days. The crème fraîche keeps it nice and moist. Green & Black do a good cocoa powder that has no sugar.
You could also make cup cakes with this recipe for an Easter hunt, though it might have to be indoors this year. The cooking time will be shorter.
Wishing you a safe and peaceful Easter and let’s all look out for each other.
Happy cooking,
Neven
Easter Bunny chocolate cake. \ Photography: Philip Doyle. Food styling: Sharon Hearne-Smith
Easter Bunny chocolate cake
Serves eight plus
For the sponge:
200g butter, softened
350g light muscovado sugar
Seeds of ½ a vanilla pod or ½ tsp vanilla extract
Six eggs (at room temperature)
300g self-raising flour
1/2 tsp baking powder
50g cocoa powder
200g crème fraîche (at room temperature)
For the chocolate frosting:
100g plain chocolate, broken into squares
175g butter, softened
350g icing sugar, sifted
2 tbsp cream
To decorate:
150g orange fondant
100g green fondant
200g white fondant
100g pink fondant
1 Preheat the oven to 180°C. Line three 20cm non-stick cake tins with parchment paper. Cream the butter and sugar together in a large bowl with a wooden spoon (or using a freestanding electric mixer) until light and fluffy. Add the vanilla seeds or extract and two of the eggs, then beat like mad again. Add another two eggs and continue to beat. The mixture may look less than perfect at this stage, but keep going and it will come good. Add the last two eggs and beat well again. Sieve together the flour, baking powder and cocoa powder. Using a large metal spoon, fold the dry ingredients into the creamed mixture in alternate batches with the crème fraîche. Mix well between each addition, scraping down the bowl with a rubber spatula.2 Using the rubber spatula, separate the mixture among the prepared tins, smoothing down the tops. Bake for 25-30 minutes, until the cakes are springy to the touch and a skewer inserted into the middle of each one of them comes out clean. Cool for five minutes in the tins, then turn out on to a wire rack and leave to cool completely.3 When the cakes have cooled down completely, make the chocolate frosting. Melt the chocolate in a heatproof bowl set over a pan of simmering water. Leave to cool a little and then mix with the rest of the chocolate frosting ingredients. I put them all in my freestanding electric mixer with a paddle attachment and beat it for a good five minutes, until it is light and spreadable but it can also be done by hand. 4 Place one of the cakes on a plate or cake stand with a blob of frosting underneath so that the cake does not move and spread the top with a little more frosting. Cover with another cake and more frosting. Top with the remaining cake, flipping it over so that the flat side of the cake is now at the top giving a good flat base for the frosting. Lightly press all the cake layers together, then use a palette knife to spread the remaining frosting evenly over the top and sides of the cake so that the sides are nice and straight and the top is flat. I like to do a thin layer first which I call the crumb layer. Then place the cake in to the freezer for 10 minutes for the layer to firm up.5 Then take the cake from the freezer and add another thicker layer of frosting and have a good play around with the knife so that it is really smooth. Sometimes it helps to run the palette knife under the warm tap and then carry on smoothing the frosting. Leave to set a little whilst you prepare the decorations.6 Shape the orange and green fondant into carrots and make the white and pink fondant into bunnies. Once the cake is set arrange the carrots and bunnies on top and serve with a flourish!
Easter Bunny chocolate cake. \ Photography: Philip Doyle. Food styling: Sharon Hearne-Smith
Red velvet cream cheese brownies
Makes nine
For the brownies:
100g white chocolate, broken into squares
100g butter
175g light brown sugar
1 tsp vanilla extract
2 tbsp cocoa powder
Two medium eggs
½ tsp red food colouring
125g plain flour
For the red velvet swirl:
200g cream cheese
2 tbsp plain flour
2 tbsp caster sugar
1 tsp vanilla extract
One medium egg yolk
To serve:
Vanilla ice cream, to serve
1 Preheat the oven to 180°C and line an 18cm square cake tin with baking parchment. Melt the white chocolate in a heatproof bowl set over a pan of simmering water (or use a microwave). Leave to cool a little.2 Melt the butter and put into a large bowl. Leave to cool and then add the light brown sugar, vanilla and cocoa powder and beat with a hand-held electric mixer. Add the eggs and food colouring and beat until well combined. 3 Fold in the melted white chocolate and then add the flour and using a large metal spoon, gently fold it all together with as few stirs as possible so you do not knock the air out of it. Gently spread into the prepared baking tin, leaving about two tablespoons behind in the bowl – you will use this later for the swirl pattern. Set aside.4 Beat all of the ingredients for the red velvet swirl in a bowl until the caster sugar is evenly combined. Dollop spoonfuls of it on top of the brownie mixture that is already in the tin. Then add the remaining two tablespoons of the brownie mixture. 5 Take a knife and swirl the brownie mixture around in the tin. Be sure not to over-swirl it otherwise the mixture will just look like a pink cake batter! But swirl deep into the tin so that the marble effect goes right through out the brownie and is not just at the top. 6 Place the tin into the oven and bake for 25-30 minutes or until the centre of the brownie springs back slightly when touched but it is still nice and gooey in the middle. Leave to cool a little in the tin, then cut into nine even-sized squares and serve warm or cold with ice cream, if you like.


 This is a subscriber-only article


SHARING OPTIONS: